Home » Without Label » Cutting Crown Molding For Kitchen Cabinets / How To Cut Crown Moulding For Kitchen Cabinets | Cabinets ... : When cutting crown, you don't have to go through the fire drill of cutting upside down and backwards and having different miter/bevel settings.
Cutting Crown Molding For Kitchen Cabinets / How To Cut Crown Moulding For Kitchen Cabinets | Cabinets ... : When cutting crown, you don't have to go through the fire drill of cutting upside down and backwards and having different miter/bevel settings.
Cutting Crown Molding For Kitchen Cabinets / How To Cut Crown Moulding For Kitchen Cabinets | Cabinets ... : When cutting crown, you don't have to go through the fire drill of cutting upside down and backwards and having different miter/bevel settings.. I then added cove molding underneath, the cove molding is the only piece that needs to be mitered. A power miter saw is the best way to cut crown moulding once you measure the angles. To cut crown molding inside corners, start by measuring the angle of the corner using an adjustable protractor, and setting a compound miter saw to the correct angles. Refer to my easy templates for cutting crown moulding or crown molding stops and cutting guide for more explanation on corners and angles and how to cut them. On a typical cabinet, all your crown moulding angles will be outside corners.
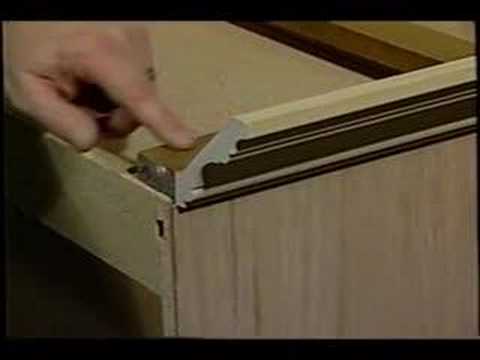
Then i cut and nailed, using a finish nail gun, the (upside down) baseboard, cut and nailed the crown moulding onto the baseboard, and finished it out with the decorative molding. Measure the length of the front of your cabinet. For strength and stability, gussets are added to the top. Hold up the first cut on one end of the cabinet. (use one long strip for a row of cabinets the same depth.) then apply wood glue to each strip, nail it in place, and let dry.
Kitchen Cabinet Crown Molding - Make Them Fancy! | Hometalk from cdn-fastly.hometalk.com Hold up the first cut on one end of the cabinet. Repeat for each cabinet side. One way to cut crown molding it to use the 90 degree intersection of the table and fence on a miter saw to play the part of wall and ceiling. (use one long strip for a row of cabinets the same depth.) then apply wood glue to each strip, nail it in place, and let dry. 21 responses to cutting & coping crown molding. Cutting crown molding for topping kitchen cabinets tends to be easier than cutting it for walls, because, unlike most walls, the square angles on cabinets actually are square. Stand your crown on the table of the miter saw on the b edge pushed back to the fence, so the a edge is against the fence, and the top of the crown is leaning toward you. Two ways to cut crown molding:
It's a good idea to cut the corner angles first, then measure the rest to fit.
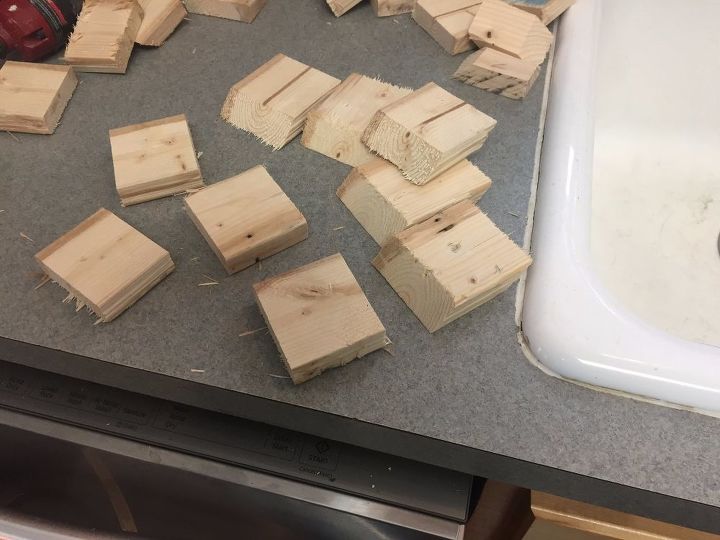
A power miter saw is the best way to cut crown moulding once you measure the angles. (use one long strip for a row of cabinets the same depth.) then apply wood glue to each strip, nail it in place, and let dry. The narrowest portion of the wood should be the vertical. It's a best practice to cut crown moulding upside down on the miter saw. Using a starter or riser molding in conjunction with a crown molding also provides the ability to better disguise an uneven ceiling, as one end of the crown molding may be mounted. Learn how to angle cut the gussets and where to locate them on the top of the cabinet. The capacities cutting crown vertically on each saw are as follows: Two ways to cut crown molding: I will be posting tutorials, in the near future, on how to i made a plate rack inside the cabinet, and how i added glass to a few of my cabinets. One way to cut crown molding it to use the 90 degree intersection of the table and fence on a miter saw to play the part of wall and ceiling. Cut one side of the molding with this setting. Cut strips of the 5/4 pine to length and width, based on the size of the cabinets. Next, place the piece of crown molding in the jig and the bed of your saw to cut the right inside corner.
Here is the only math. Cut one side of the molding with this setting. A power miter saw is the best way to cut crown moulding once you measure the angles. Crown molding that sits atop kitchen cabinets gives them a solid, finished look. Once the cuts are all made, spray paint the filler pieces to.
How To Install Crown Molding On Kraftmaid Kitchen Cabinets ... from i.ytimg.com (bottom of molding is decorative side). Next, place the piece of crown molding in the jig and the bed of your saw to cut the right inside corner. Then, set the miter saw angle again and use another piece of crown. Repeat for each cabinet side. One way to cut crown molding it to use the 90 degree intersection of the table and fence on a miter saw to play the part of wall and ceiling. I will be posting tutorials, in the near future, on how to i made a plate rack inside the cabinet, and how i added glass to a few of my cabinets. Next you set your jig to reflect that angle (in my case 52): Next you need the angle of the wall (or in my case cabinet) you are trying to go around.
And it isn't really 'hard math' since my 5 year old could do it.divide that angle in half (since you want to your crown to meet right in the center of your angle):
Hold up the first cut on one end of the cabinet. Use a pencil to mark the exact spot that needs to be cut. How to install a picture rail. Then i cut and nailed, using a finish nail gun, the (upside down) baseboard, cut and nailed the crown moulding onto the baseboard, and finished it out with the decorative molding. 21 responses to cutting & coping crown molding. Take a molding that is longer than the measured length. And the cuts are even weirder. Then, mark the molding to guide you for the second cut. Cut one side of the molding with this setting. Measure a piece of crown molding equal to the length of the cabinet. Make rabbet cuts on the filler pieces so that the piece fits tightly on the top of the cabinet and over the door of the cabinet. When cutting crown molding in this orientation the bottom of the molding goes against the fence. Pick one side of your cabinet to start with.
Here is the only math. Pick one side of your cabinet to start with. Measure a piece of crown molding equal to the length of the cabinet. My angles were 45 degrees. Next, place the piece of crown molding in the jig and the bed of your saw to cut the right inside corner.
How To Cut Crown Moulding For Kitchen Cabinets | online ... from compoundmiter.com Take a molding that is longer than the measured length. Here is the only math. (use one long strip for a row of cabinets the same depth.) then apply wood glue to each strip, nail it in place, and let dry. Pick one side of your cabinet to start with. Then, mark the molding to guide you for the second cut. Learn how to angle cut the gussets and where to locate them on the top of the cabinet. Steps for hanging crown molding: When cutting crown, you don't have to go through the fire drill of cutting upside down and backwards and having different miter/bevel settings.
(bottom of molding is decorative side).
Crown molding that sits atop kitchen cabinets gives them a solid, finished look. How to install a picture rail. You don't want this molding to pull off the cabinet if someone pulls or pushes on it when moving the cabinet, for example. These will be the filler pieces. Using a starter or riser molding in conjunction with a crown molding also provides the ability to better disguise an uneven ceiling, as one end of the crown molding may be mounted. Repeat for each cabinet side. (bottom of molding is decorative side). Here is the only math. Once the cuts are all made, spray paint the filler pieces to. The narrowest portion of the wood should be the vertical. Pick one side of your cabinet to start with. A starter or riser molding is mounted to the cabinet top in order to simulate an extension of the cabinet box, allowing the crown molding to be installed higher. Stand your crown on the table of the miter saw on the b edge pushed back to the fence, so the a edge is against the fence, and the top of the crown is leaning toward you.